Usage: A supplemental for our ELL students.
Login page at: https://minooka.rosettastoneclassroom.com (both student and teacher)
Support Videos at: https://support.rosettastone.com/en/k-12/Foundations/articles/Foundations-Administrator-Tool-Tutorial-Videos
How do I add a student (leaner) in Rosetta Stone?
Required permission: "Create or Import Learners",
Students are called "Leaner" in Rosetta Stone platform.
- Go to Learners > Register
- Enter in the following:
- Username - this is the student's username that they'll log into Rosetta stone with. This has to be unique for the entire district. Recommendation: Use the student's computer email (before the @min201.org and password. Unsure of what this is?
- Psassword - this can be the same for all students if necessary. Once you set it, it'll only show you **** regardless of length, and the only option is then to reset the password.
- Confirmation Password - needs to be the same as the Password
- First Name and Last Name are required, while Middle Name is optional.
- Time Zone - Central -6
- Country = United States
- Interface Language - this is the language that will appear on the login and help pages. Recommendation; Student's home language or the language that they are most comfortable with.
- Language - this is the language that the student will be getting the curriculum in. Recommendation: English
- Notes - optional, but you can put anything in here. You can also use this field to search for information as well.
- Home Group - this is the group with the 'house' that the student belongs to (IE: PK student, K-4 Student, 5-8th Student)
- Group - this is the actual subgroup that the students are assigned to.
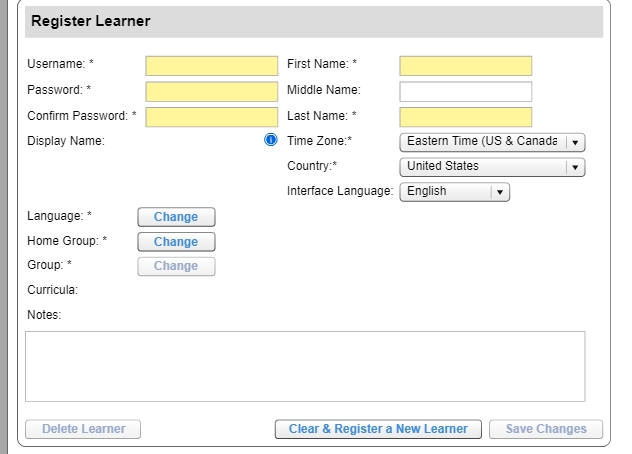
- When done hit Save Changes.
- If "Save Changes" is greyed out, then a required field is missing somewhere on the registration form.
A student moved from say AUX to MIS by means of promotion. How do I update him to be in the new group?
Required permission: "Create or Import Learners"
- Find the student by clicking on Learners > Lists > Expand the group that the student was in.
- Double click on their name.
- Change the student's home group and group from the old building to the new building.
- Hit Save when complete.
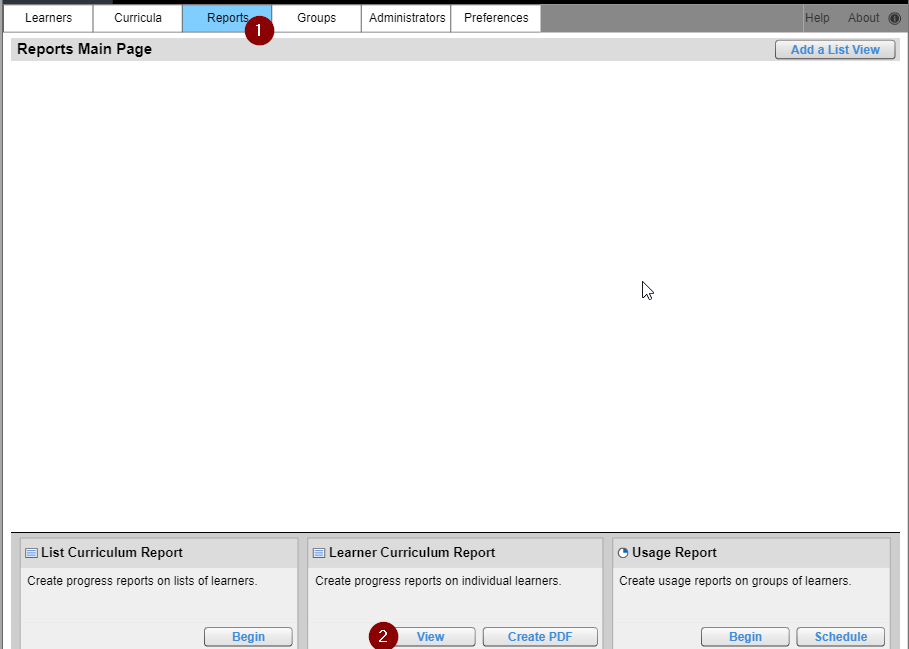
What kind of reports are available to me?
There are 3 reports: (1) List Curriculumn Report, (2) List Curriculum Learners and (3) Usage Report.
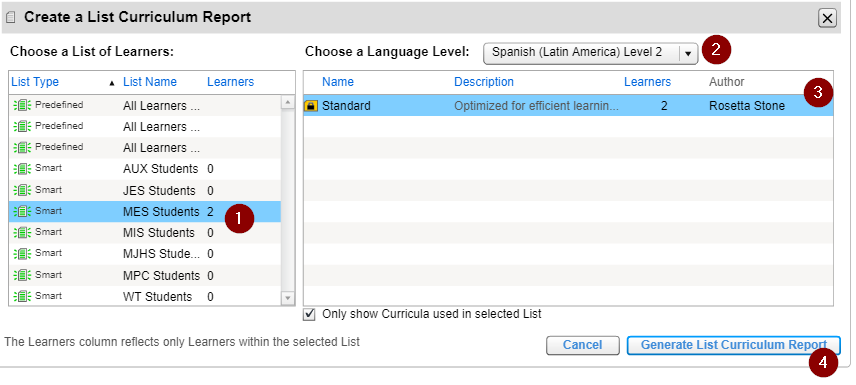
- List Curriculum Report
- Uses a predefined, custom or smart list and curriculum that the learner is registered on. It'll provide you with breakdown of the learner's progress and graph about learner trends.
- To Access, click on Reports > Begin in the bottom left.

- In the new window that appears:
- First choose the list of learners you wish to view.
- Choose a language that the student(s) were working on.
- Click on the curriculum that the learners were working on.
- Click on the blue 'Generate List Curriculum Report"
- Note: If this button isn't highlighted, then you are missing something before you are able to generate the report.
- Note: If this button isn't highlighted, then you are missing something before you are able to generate the report.
- Learner Curriculum
- This report simply requires a student's username and the level of study that the student's is working on. It'll generate a single detailed report per student.
- In the New window that appears:
- First, find the student that you want to view the report on. You can either search in the group of students, or there is some advanced searching capabilities. Either way, when you're done searching, click on the 'Show Learners' button.
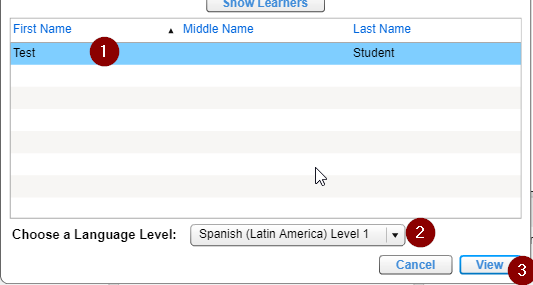
In this example, we're looking for the learner with the last name of 'Student". I don't know which group the student is apart of, so instead I'll just search by last name.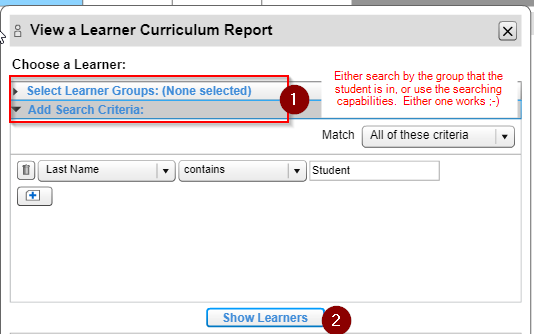
- Click on the student that you wish to view the report for, then choose the language level that you wish to see the report on and finally when complete, click the 'View' button.
- First, find the student that you want to view the report on. You can either search in the group of students, or there is some advanced searching capabilities. Either way, when you're done searching, click on the 'Show Learners' button.
- Usage Report
- These are broad reports which based on the groups and the languages that are being used in the group.
- NOTE: a scheduled report will email it to the district administrators, and only 1 report can be active per site at a time.